Creating a Semantic Portal using the Sampo-UI framework
Sampo Model page | Sampo-UI page | Sampo-UI GitHub | Legacy version tutorial
This tutorial will teach you how to quickly create a web application with faceted search and analytic tools on an existing SPARQL endpoint. We will use DBpedia as an example case.
Requirements
To follow along this tutorial, you will need the following on your machine:
- any code editor
- Docker
- Docker Compose
Setup
All the configuration for your semantic portal will be stored in a
configuration file folder. Create a new working directory for storing
this folder (and a possible custom components folder). If you are
building a new semantic portal, make a copy of the configs
folder in the Sampo-UI repository to use as your base. You'll also want
to copy the contents of the example.env file to your
.env own file.
For the Sampo-UI client and server code, you can either use existing, pre-built Sampo-UI images or a local copy of the framework for development.
Using existing images
Pre-built images of Sampo-UI are publically available on GitHub: https://github.com/orgs/SemanticComputing/packages?repo_name=sampo-ui
There are three different images:
sampo-ui-combosampo-ui-serversampo-ui-client
The sampo-ui-combo image combines
sampo-ui-server and sampo-ui-client images
into one, which can make things easier to run depending on your setup.
So, if you want to use a single image, you only need the
sampo-ui-combo image, otherwise you will need the
sampo-ui-server and sampo-ui-client
images.
The Sampo-UI framework repository has multiple YAML files to be used with Docker Compose:
- development: https://github.com/SemanticComputing/sampo-ui/blob/master/compose.yaml
- production: https://github.com/SemanticComputing/sampo-ui/blob/master/compose-prod.yaml
Create copies of the relevant YAML file(s) to the working directory you are using for your semantic portal and replace the image references to refer to the pre-built images:
- combo service:
image: ghcr.io/semanticcomputing/sampo-ui-combo:latest- server service:
image: ghcr.io/semanticcomputing/sampo-ui-server:latest- client service:
image: ghcr.io/semanticcomputing/sampo-ui-client:latestAfter doing this, you should be able to start the containers with the following commands in the directory:
- development /
compose.yaml
docker compose up- production /
compose-prod.yaml
docker compose -f compose-prod.yaml upIf your YAML file multiple services, you can choose to start only one of them by specifying its name at the end of the command, e.g. starting only the combo container with the following:
docker compose -f compose-prod.yaml up comboIf you have not changed the ports in the YAML files, your semantic
portal will be available at either http://localhost:8080/
(compose.yaml or separate client container with
compose-prod.yaml) or http://localhost:3002/ (combo
container with compose-prod.yaml).
If you open it in your browser, you should see something like this:
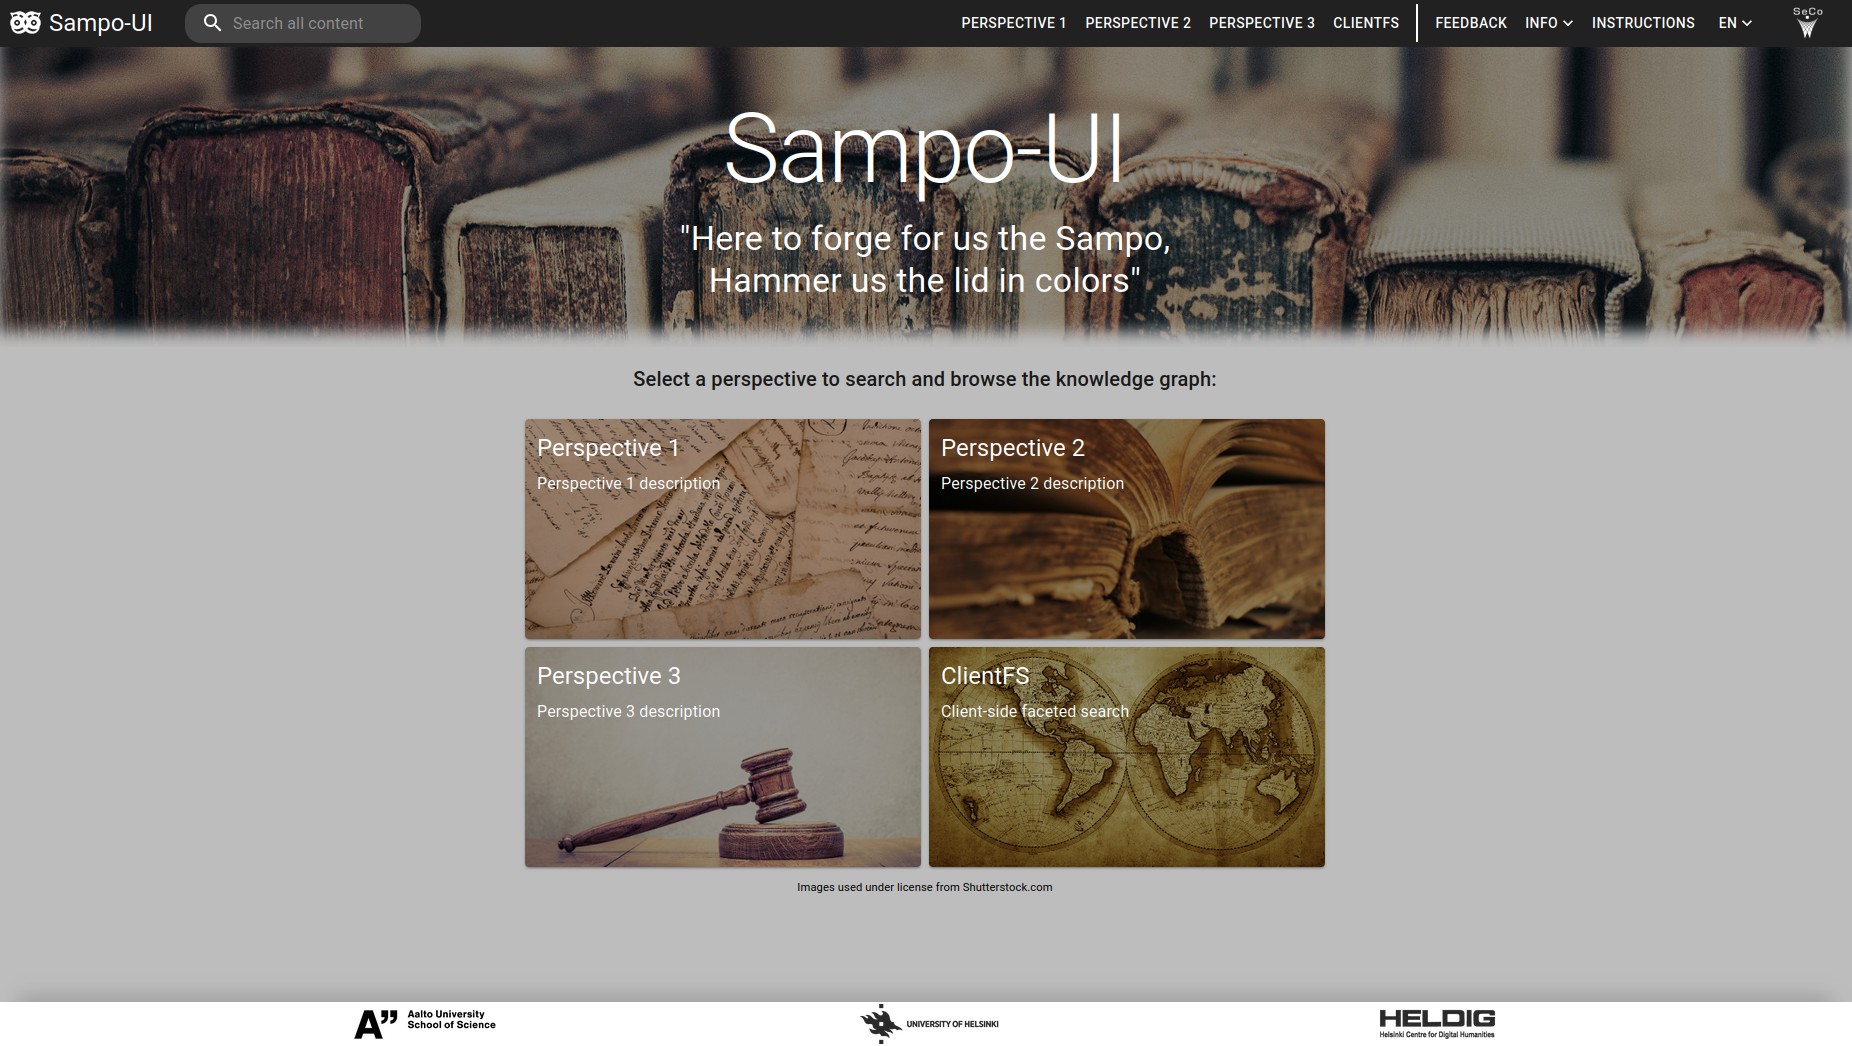
You can now start modifying your configuration files and queries to adapt it to your own endpoint and data.
Local files
Clone the Sampo-UI repository on Github: https://github.com/SemanticComputing/sampo-ui
If you are storing your own semantic portal's configs in another
directory (recommended), you will need to make copies of the relevant
Docker Compose YAML files to the working directory where your
configs folder is:
- development:
compose.yaml - production:
compose-prod.yaml
Adjust the build contexts to match the path to your local copy of the Sampo-UI framework from the current directory. E.g.,
- client
build:
    context: ./client
↓
build:
context: ./../sampo-ui/client- server
build:
    context: ./server
↓
build:
context: ./../sampo-ui/server- combo
build:
    context: .
↓
build:
    context: ./../sampo-ui
Remember to also adjust the volume paths (e.g.,
- ./client:/app/client →
- ./../sampo-ui/client:/app/client) if you are using
volumes (development).
After doing this, you should be able to build the images with the following commands in the directory:
- development /
compose.yaml
docker compose build- production /
compose-prod.yaml
docker compose -f compose-prod.yaml buildand then start them with the following commands:
- development /
compose.yaml
docker compose up- production /
compose-prod.yaml
docker compose -f compose-prod.yaml upIf you have not changed the ports in the YAML files, your semantic
portal will be available at either http://localhost:8080/
(compose.yaml or separate client container with
compose-prod.yaml) or http://localhost:3002/ (combo
container with compose-prod.yaml).
If you open it in your browser, you should see something like this:
You can now start modifying your configuration files and queries to adapt it to your own endpoint and data.
QUICKSTART TUTORIAL
In this quickstart tutorial we'll be setting up a new Sampo portal by
just editing the files that already exist in the base Sampo-UI
framework. If you want to follow along a more detailed configuration
tutorial, you can have a look at the Basic configuration
section in the tutorial for the legacy version of Sampo-UI: https://seco.cs.aalto.fi/tools/sampo-ui/Sampo-UI-tutorial.pdf.
The file locations mentioned in that tutorial will be outdated
(everything should now be inside the configs folder), but
the file names and the configuration logic still applies.
First navigate to the perspective1.json configuration
file in the directory of
configs/sampo/search_perspectives/. This is the
configuration file for the first perspective we see on the landing page,
Perspective 1. This will be the file that we will mainly be editing in
this tutorial. We'll first need to edit the endpoint to the DBpedia
endpoint by changing the value of the attribute url in the
endpoint object to https://dbpedia.org/sparql:
...
"endpoint": {
    "url": "https://dbpedia.org/sparql",
    "useAuth": false,
    "prefixesFile": "SparqlQueriesPrefixes.js"
},
...
Let's make our lives easier by defining the dbr prefix
to refer to http://dbpedia.org/resource/ and
dbo to http://dbpedia.org/ontology/. This is
done by adding a new line to the SparqlQueriesPrefixes.js file located
in the portal's SPARQL queries directory
configs/sampo/sparql_queries/:
export const prefixes = `
    PREFIX skos: <http://www.w3.org/2004/02/skos/core#>
    PREFIX rdf: <http://www.w3.org/1999/02/22-rdf-syntax-ns#>
    PREFIX rdfs: <http://www.w3.org/2000/01/rdf-schema#>
    ...
    PREFIX semparls: <http://ldf.fi/schema/semparl/>
    PREFIX dbr: <http://dbpedia.org/resource/>
    PREFIX dbo: <http://dbpedia.org/ontology/>
`
This way we can use this prefix in our queries. Let's define our
facet class for this perspective to be DBpedia's Writer class through
the facetClass attribute:
...
"sparqlQueriesFile": "SparqlQueriesPerspective1.js",
"baseURI": "http://ldf.fi/mmm",
"URITemplate": "<BASE_URI>/work/<LOCAL_ID>",
"facetClass": "dbo:Writer",
...
If we hadn't added the prefix to the list of prefixes, we could've spelled out the whole URI here instead.
Now let's edit the base URI and template to match the one used in
DBpedia. For example, Oscar Wilde's URI in DBpedia is
http://dbpedia.org/resource/Oscar_Wilde. We want to take
the part Oscar_Wilde as the local URI to be used in our
URLs. In this case the base URI would then be
http://dbpedia.org/resource/ and the template becomes
<BASE_URI><LOCAL_ID>:
...
"sparqlQueriesFile": "SparqlQueriesPerspective1.js",
"baseURI": "http://dbpedia.org/resource/",
"URITemplate": "<BASE_URI><LOCAL_ID>",
"facetClass": "dbo:Writer",
...
Let's remove some extra properties and facets for now. Remove all the
other properties objects from the properties object apart from the URI
(uri) and preferred label (prefLabel):
...
"properties": [
    {
        "id": "uri",
        "valueType": "object",
        "makeLink": true,
        "externalLink": true,
        "sortValues": true,
        "numberedList": false,
        "onlyOnInstancePage": true
    },
    {
        "id": "prefLabel",
        "valueType": "object",
        "makeLink": true,
        "externalLink": false,
        "sortValues": true,
        "numberedList": false,
        "minWidth": 250
    }
],
...
Remove all the facet objects from the facets object
except for the preferred label (prefLabel). Inside the
preferred label object remove all attributes except for the
sortByPredicate attribute. Change the value of
sortByPredicate to rdfs:label as this is the
label property used in DBpedia:
...
"facets": {
    "prefLabel": {
        "sortByPredicate": "rdfs:label"
    }
}
...
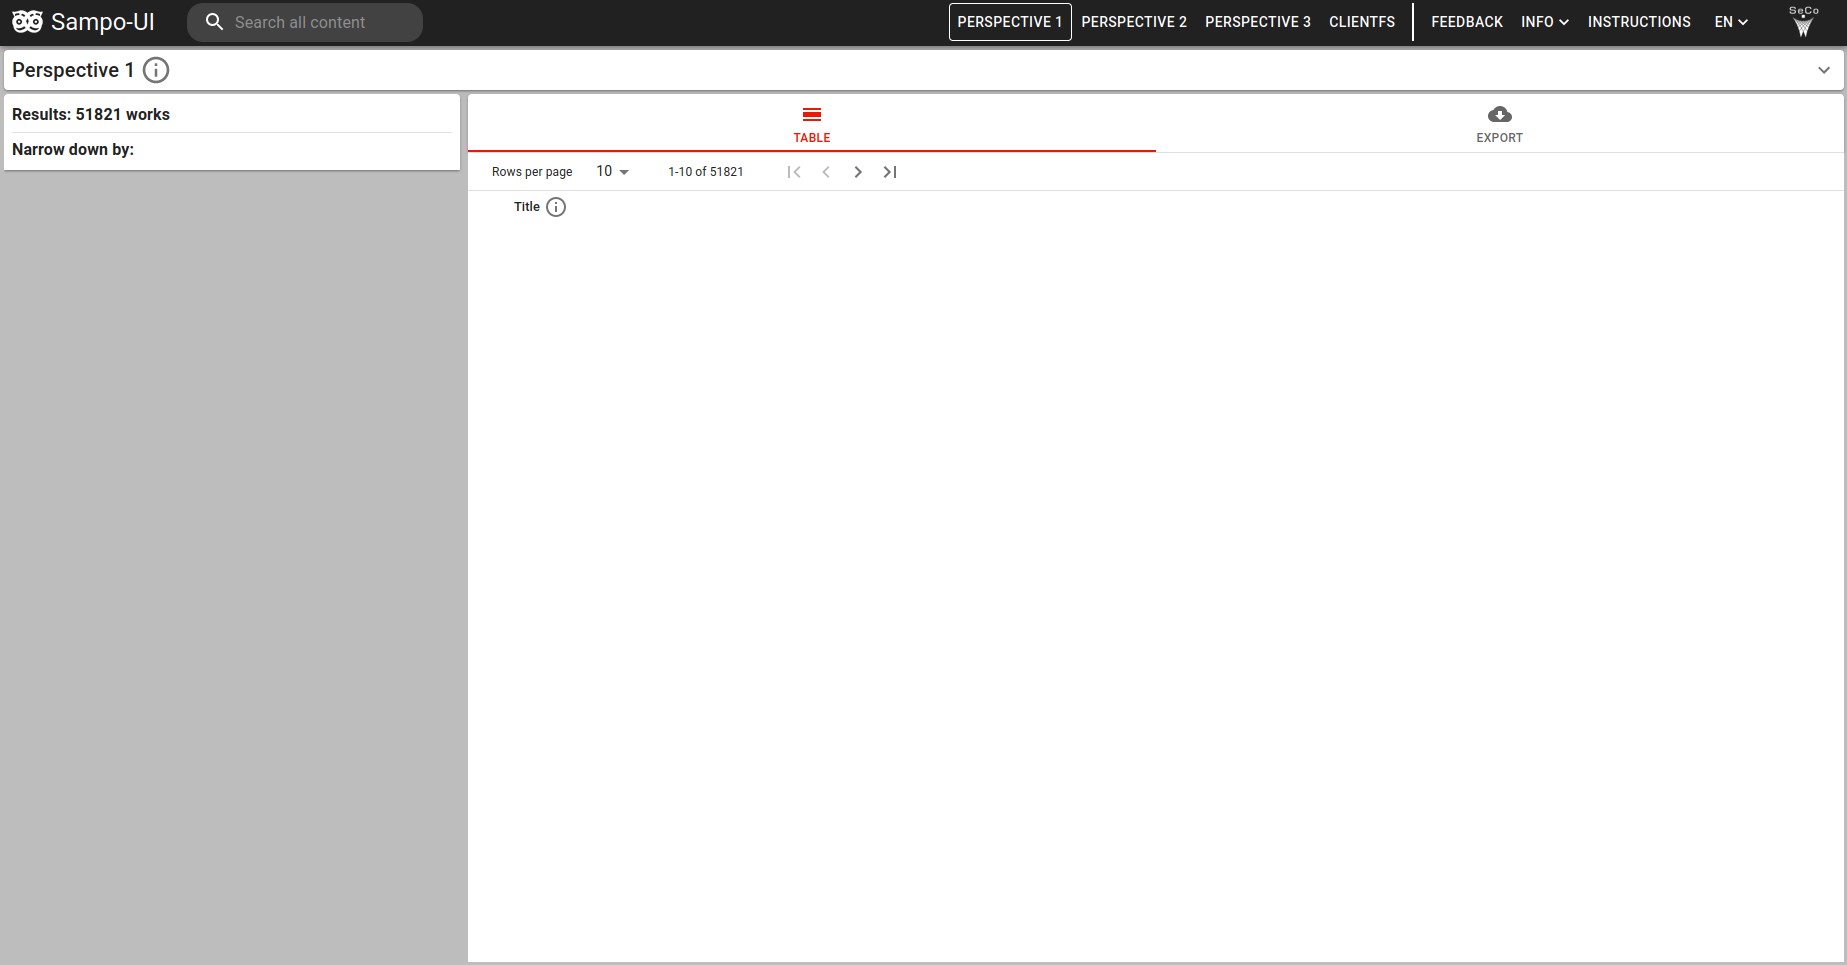
Now, if we check the Perspective 1 view running on localhost by
clicking on the Perspective 1 card on the landing page, we can see that
the table view is empty, only has one column Title and no
facets. We'll need to edit the query file next.
Open the SparqlQueriesPerspective1.js query file located
in the directory configs/sampo/sparql_queries/. Remove all
query blocks in the query inside the workProperties
variable except for the first block and change the
skos:prefLabel to rdfs:label here as well:
export const workProperties = `
    {
        ?id rdfs:label ?prefLabel__id .
        BIND(?prefLabel__id AS ?prefLabel__prefLabel)
        BIND(CONCAT("/${perspectiveID}/page/", REPLACE(STR(?id), "^.*\\\\/(.+)", "$1")) AS ?prefLabel__dataProviderUrl)
        BIND(?id as ?uri__id)
        BIND(?id as ?uri__dataProviderUrl)
        BIND(?id as ?uri__prefLabel)
    }
`
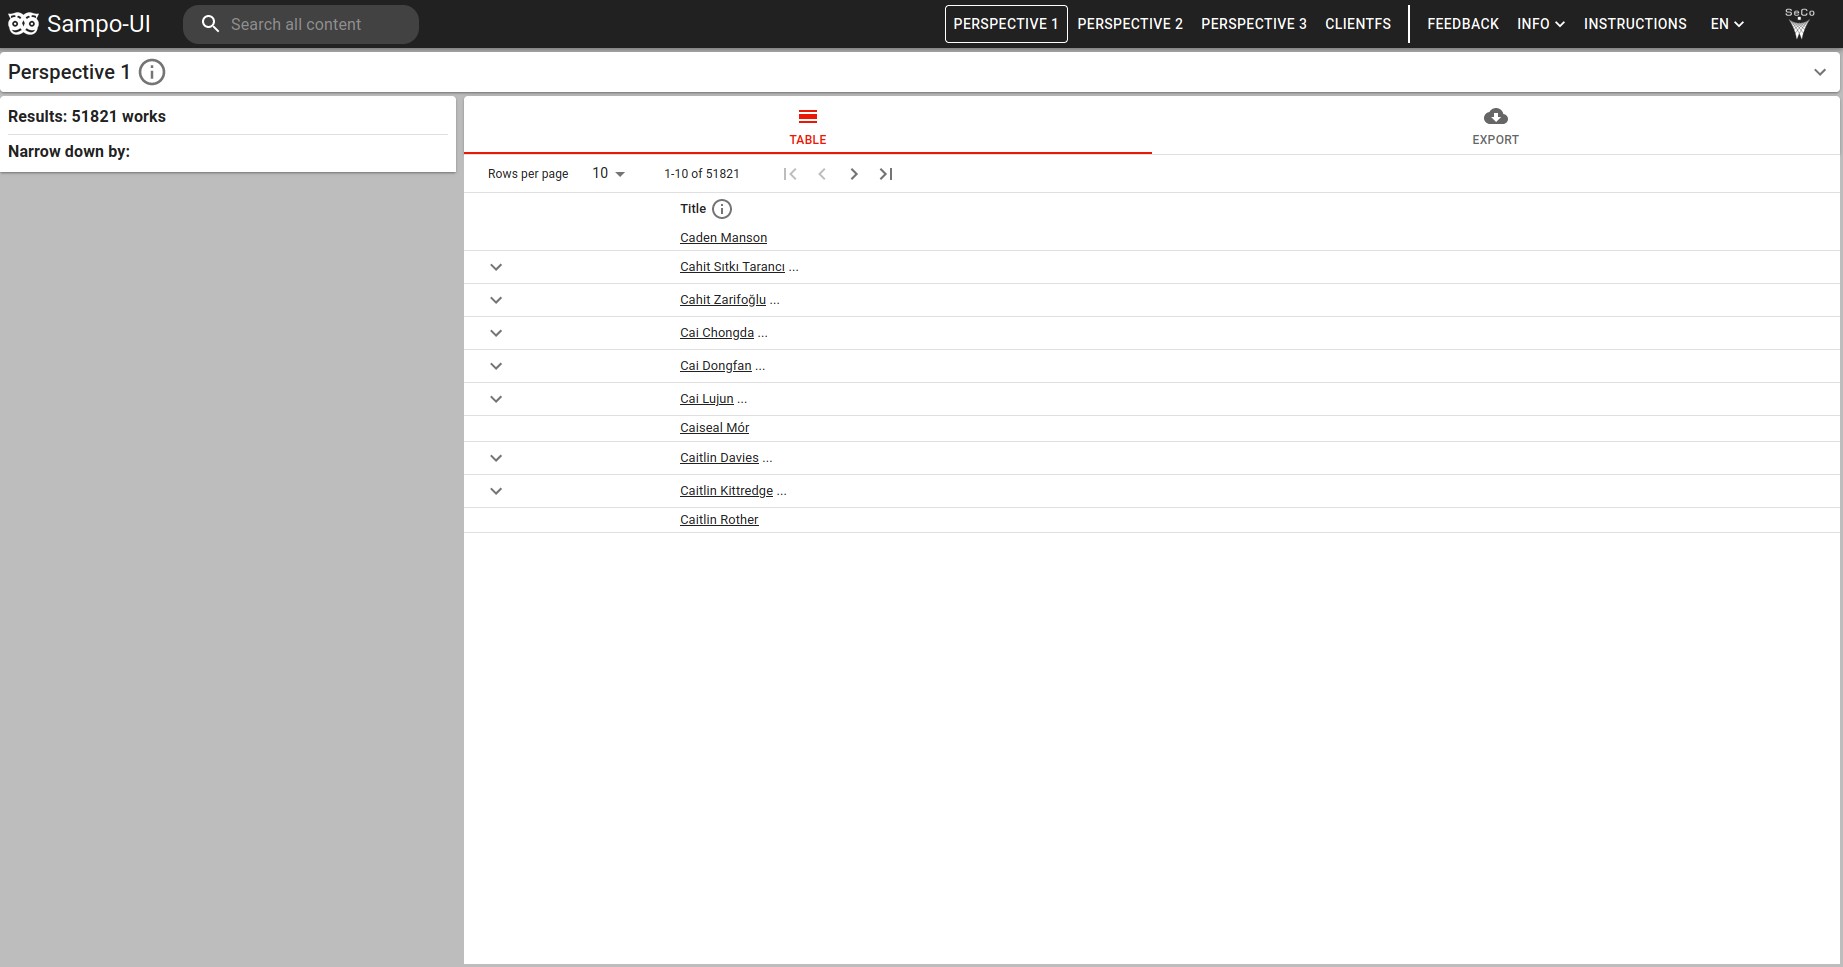
You should now be able to see a list of names in the table view. If the changes do not appear after refreshing the page, you might need to restart the container.
Now we can start to expand the properties included in the table view.
Let's add three more properties about the writers: the genre(s) they
wrote, their occupation(s) and their alma mater. In DBpedia these
properties are denoted with the predicates dbo:genre,
dbo:occupation and dbo:almaMater
respectively.
Let's first define the configurations for them in the perspective configuration file. All of the properties receive their values as objects:
...
"properties": [
    {
        "id": "uri",
        "valueType": "object",
        "makeLink": true,
        "externalLink": true,
        "sortValues": true,
        "numberedList": false,
        "onlyOnInstancePage": true
    },
    ...
    {
        "id": "genre",
        "valueType": "object",
        "makeLink": false,
        "externalLink": false,
        "sortValues": true,
        "numberedList": false,
        "minWidth": 250
    },
    {
        "id": "occupation",
        "valueType": "object",
        "makeLink": true,
        "externalLink": false,
        "sortValues": true,
        "numberedList": false,
        "minWidth": 250
    },
    {
        "id": "almaMater",
        "valueType": "object",
        "makeLink": true,
        "externalLink": false,
        "sortValues": true,
        "numberedList": false,
        "minWidth": 250
    }
],
...
Now we have to write the queries for these properties. Pay attention to the IDs you give the properties: you have to use the same name for the variables in the queries.
Let's first write the query for the genres. Since the genre property
has objects as its values, we need to first capture the ID of the genre
entity under id. To capture this, you need to store it in a
variable with the name format of ?[PROPERTY NAME]__id
(e.g., ?genre__id in this case) with two underscores
between. The label of the entity should be captured similarly under
prefLabel, e.g. ?genre__prefLabel. Lastly,
since we're only interested in the English labels of these genres, we
filter the language of the label to only English:
export const workProperties = `
    {
        ?id rdfs:label ?prefLabel__id .
        ...
    }
    UNION
    {
        ?id dbo:genre ?genre__id .
        ?genre__id rdfs:label ?genre__prefLabel .
        FILTER(LANG(?genre__prefLabel) = 'en')
    }
`
Now we write the queries for occupations and alma mater:
export const workProperties = `
    {
        ?id rdfs:label ?prefLabel__id .
        ...
    }
    UNION
    {
        ?id dbo:genre ?genre__id .
        ?genre__id rdfs:label ?genre__prefLabel .
        FILTER(LANG(?genre__prefLabel) = 'en')
    }
    UNION
    {
        ?id dbo:occupation ?occupation__id .
        ?occupation__id rdfs:label ?occupation__prefLabel .
        FILTER(LANG(?occupation__prefLabel) = 'en')
    }
    UNION
    {
        ?id dbo:almaMater ?almaMater__id .
        ?almaMater__id rdfs:label ?almaMater__prefLabel .
        FILTER(LANG(?almaMater__prefLabel) = 'en')
    }
`
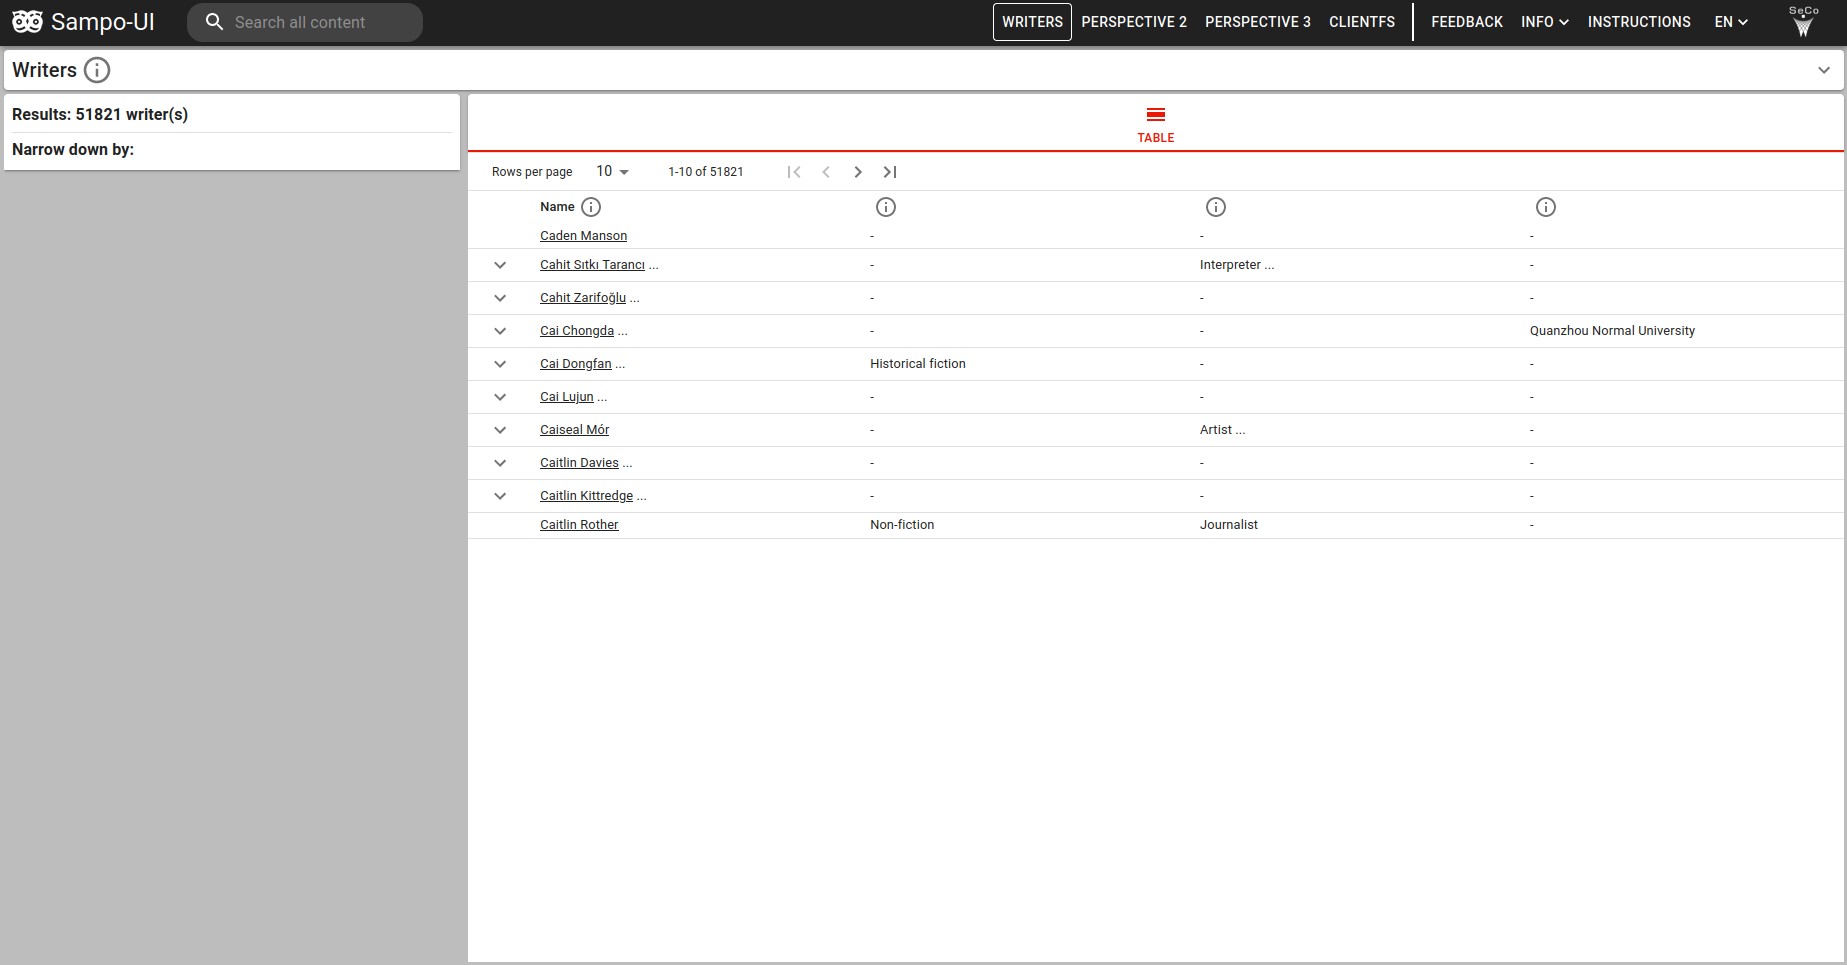
If we refresh the page now, we should be seeing some values for these properties in the table.
Let's now add the facets for filtering the data based on these same properties. We'll start with the facet for genres:
...
"facets": {
    "prefLabel": {
        "sortByPredicate": "rdfs:label"
    },
    "genre": {
        "containerClass": "ten",
        "facetType": "list",
        "filterType": "uriFilter",
        "facetLabelPredicate": "rdfs:label",
        "facetLabelFilter": "FILTER(LANG(?prefLabel_) = 'en')",
        "predicate": "dbo:genre",
        "searchField": true,
        "sortButton": true,
        "sortBy": "instanceCount",
        "sortByPredicate": "dbo:genre/rdfs:label",
        "sortDirection": "desc"
    }
}
...
Since the values of genres are objects, we want to use the
uriFilter filter type and list facet type to
get a facet with checkboxes. The containerClass attribute
determines the height of the facet, ten is usually used for
checkbox facets and four for text search facets.
To get the correct values for the facet, we need to define the
predicate using the predicate attribute. Since DBpedia uses
rdfs:label instead of skos:prefLabel that is
used by default for labels in the Sampo-UI framework, we need to use
facetLabelPredicate to specify the predicate used for
labels. We also need to add the facetLabelFilter attribute
to just get the English labels.
We can now add the rest of the facets in a similar way:
...
"facets": {
    "prefLabel": {
        "sortByPredicate": "rdfs:label"
    },
    "genre": {
        "containerClass": "ten",
        ...
    },
    "occupation": {
        "containerClass": "ten",
        "facetType": "list",
        "filterType": "uriFilter",
        "facetLabelPredicate": "rdfs:label",
        "facetLabelFilter": "FILTER(LANG(?prefLabel_) = 'en')",
        "predicate": "dbo:occupation",
        "searchField": true,
        "sortButton": true,
        "sortBy": "instanceCount",
        "sortByPredicate": "dbo:occupation/rdfs:label",
        "sortDirection": "desc"
    },
    "almaMater": {
        "containerClass": "ten",
        "facetType": "list",
        "filterType": "uriFilter",
        "facetLabelPredicate": "rdfs:label",
        "facetLabelFilter": "FILTER(LANG(?prefLabel_) = 'en')",
        "predicate": "dbo:almaMater",
        "searchField": true,
        "sortButton": true,
        "sortBy": "instanceCount",
        "sortByPredicate": "dbo:almaMater/rdfs:label",
        "sortDirection": "desc"
    }
}
...
If you refresh the page, we should now have a table with four columns and three facets in the facet menu. We're almost ready with our new simple Sampo portal! Now we just need to add the localizations to add the labels for the new columns and facets.
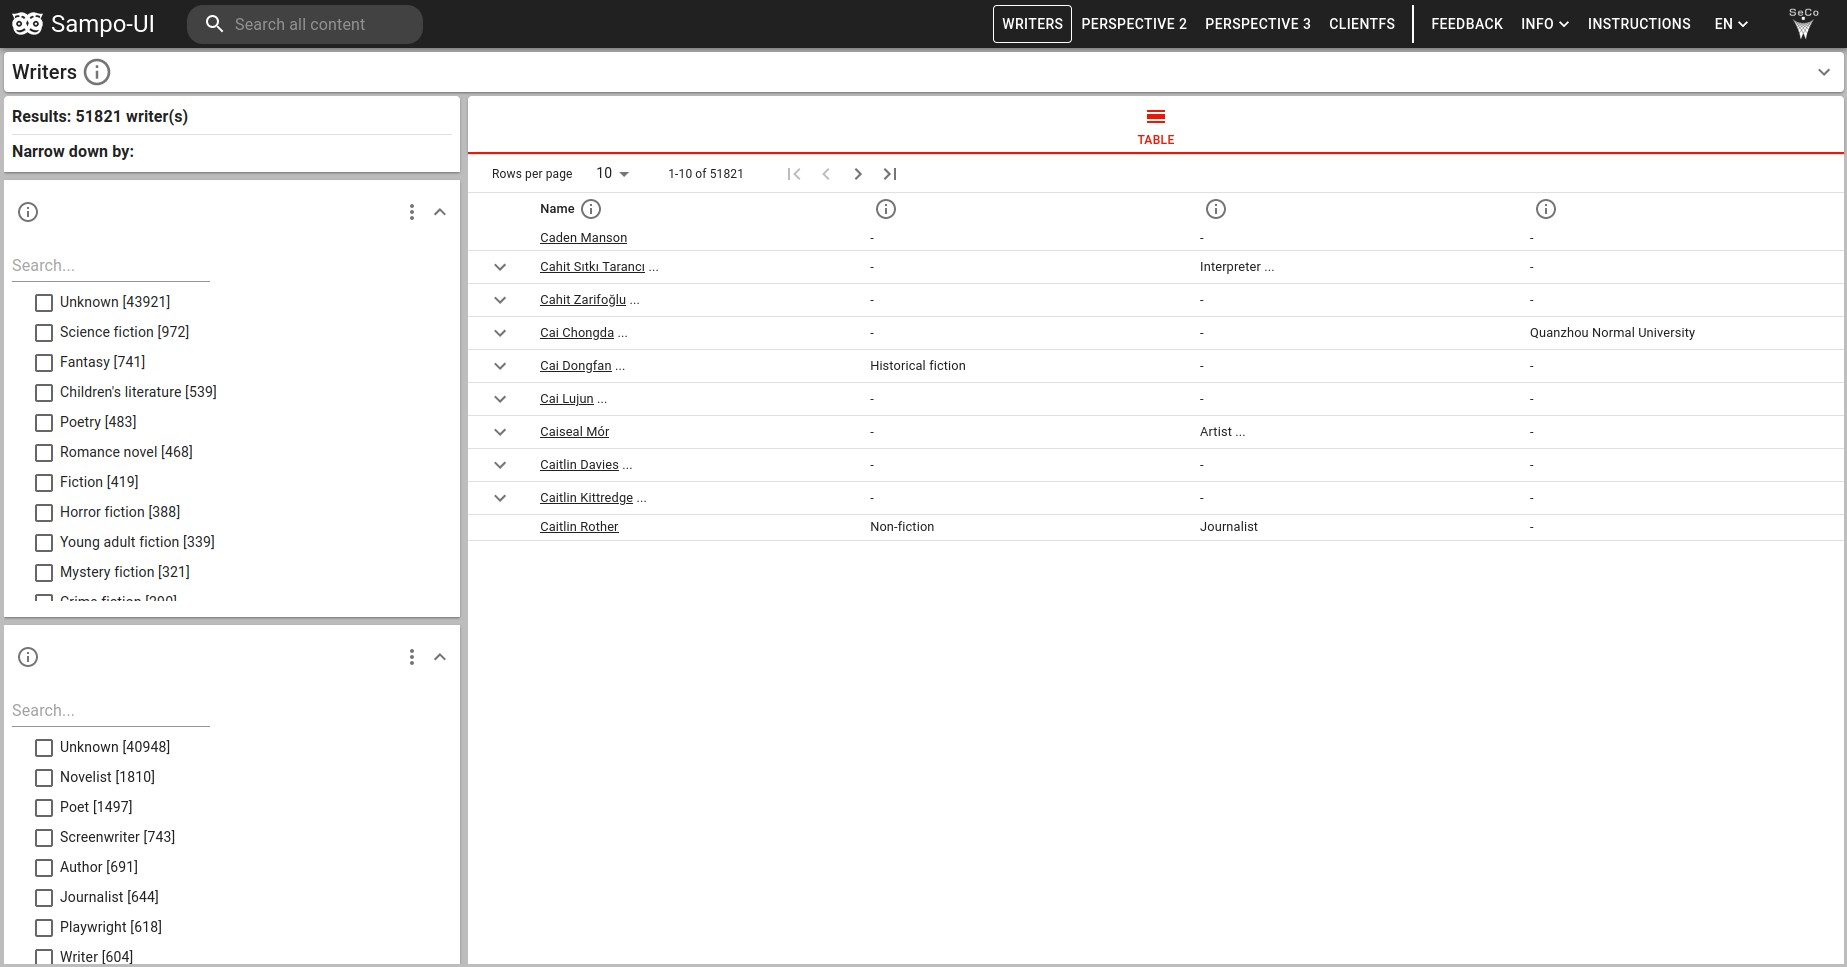
Let's open the localeEN.json file located in the
directory configs/sampo/translations/. Find the part where
the labels for perspective1 are defined. Let's first change
some general labels for the perspective:
...
"perspective1": {
    "label": "Writers",
    "facetResultsType": "writer(s)",
    "shortDescription": "A perspective for browsing and searching writers",
    "longDescription": "",
    "instancePage": {
        "label": "Writer",
        "description": ""
    },
    ...
Next you can remove the labels for the extra properties we removed and add labels for our newly created properties using the IDs we defined earlier:
...
"properties": {
    "uri": {
        "label": "URI",
        "description": "Uniform Resource Identifier"
    },
    "prefLabel": {
        "label": "Name",
        "description": "The name of the writer.",
        "textFacetInputPlaceholder": "Search..."
    },
    "genre": {
        "label": "Genre",
        "description": "The genre(s) the author has written."
    },
    "occupation": {
        "label": "Occupation",
        "description": "The occupation of the writer."
    },
    "almaMater": {
        "label": "Alma mater",
        "description": "The alma mater of the writer."
    }
},
...
The English labels now should've updated for your perspective. If you want to define labels in other languages, you just need to do the same changes to other locale files you have.
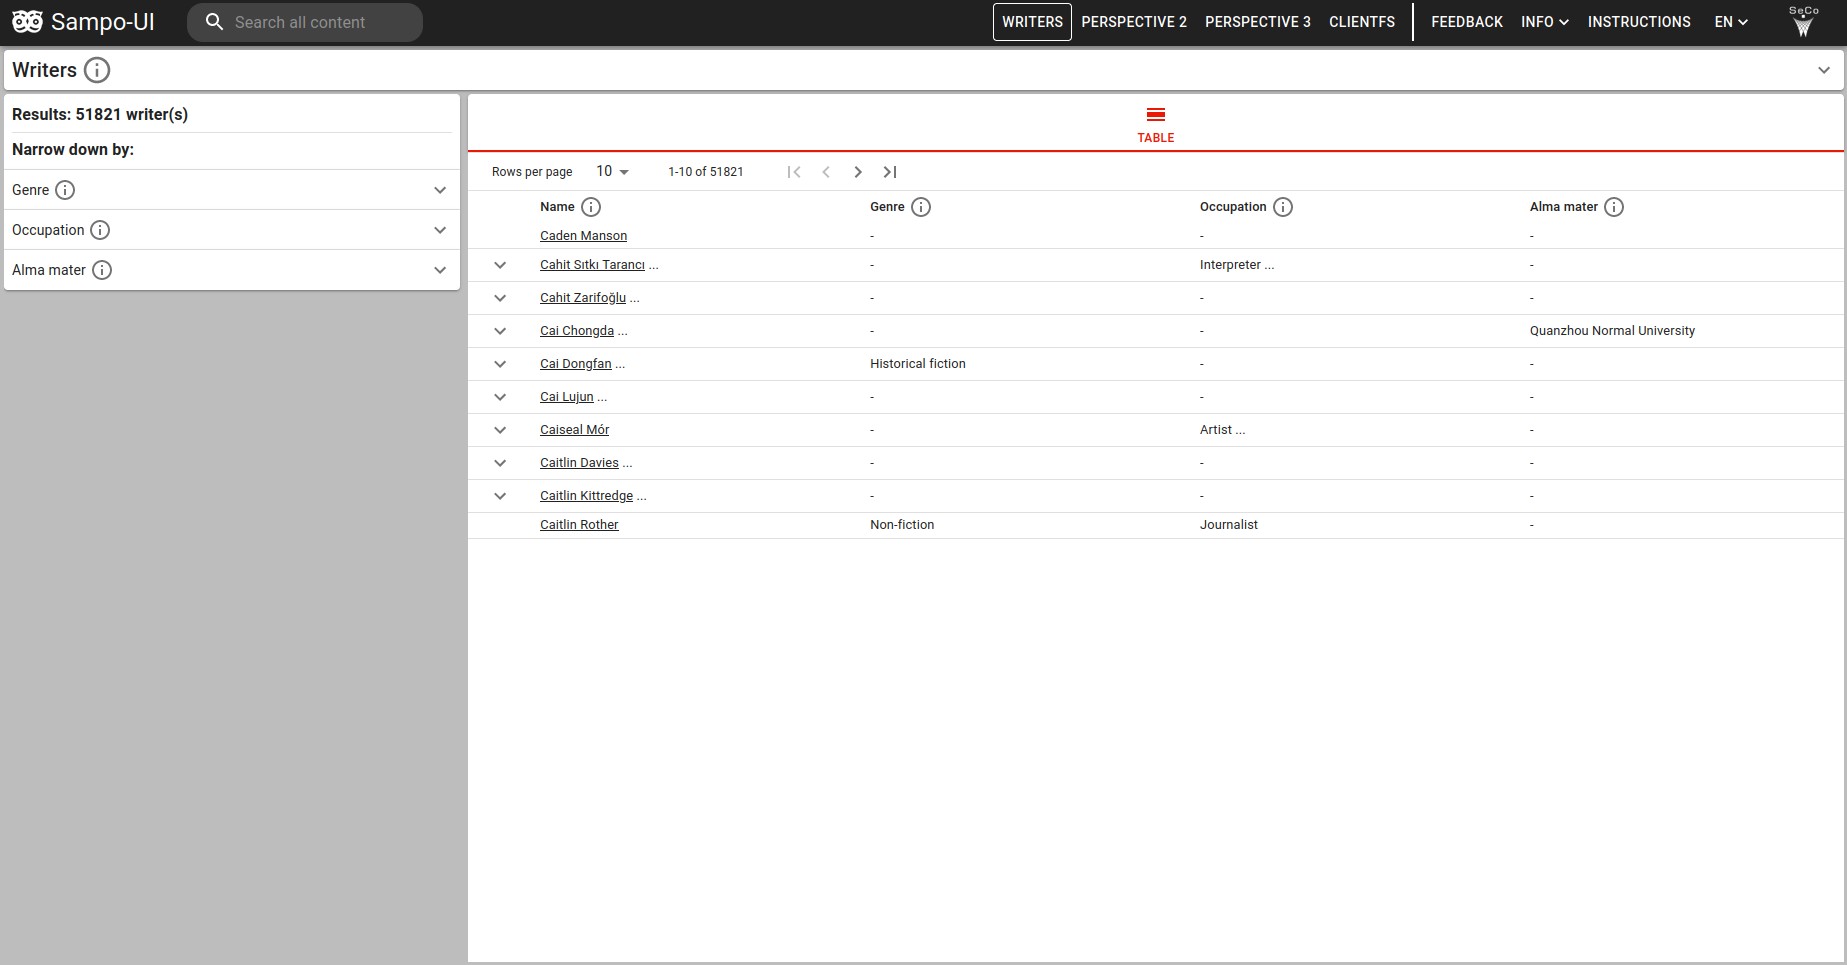
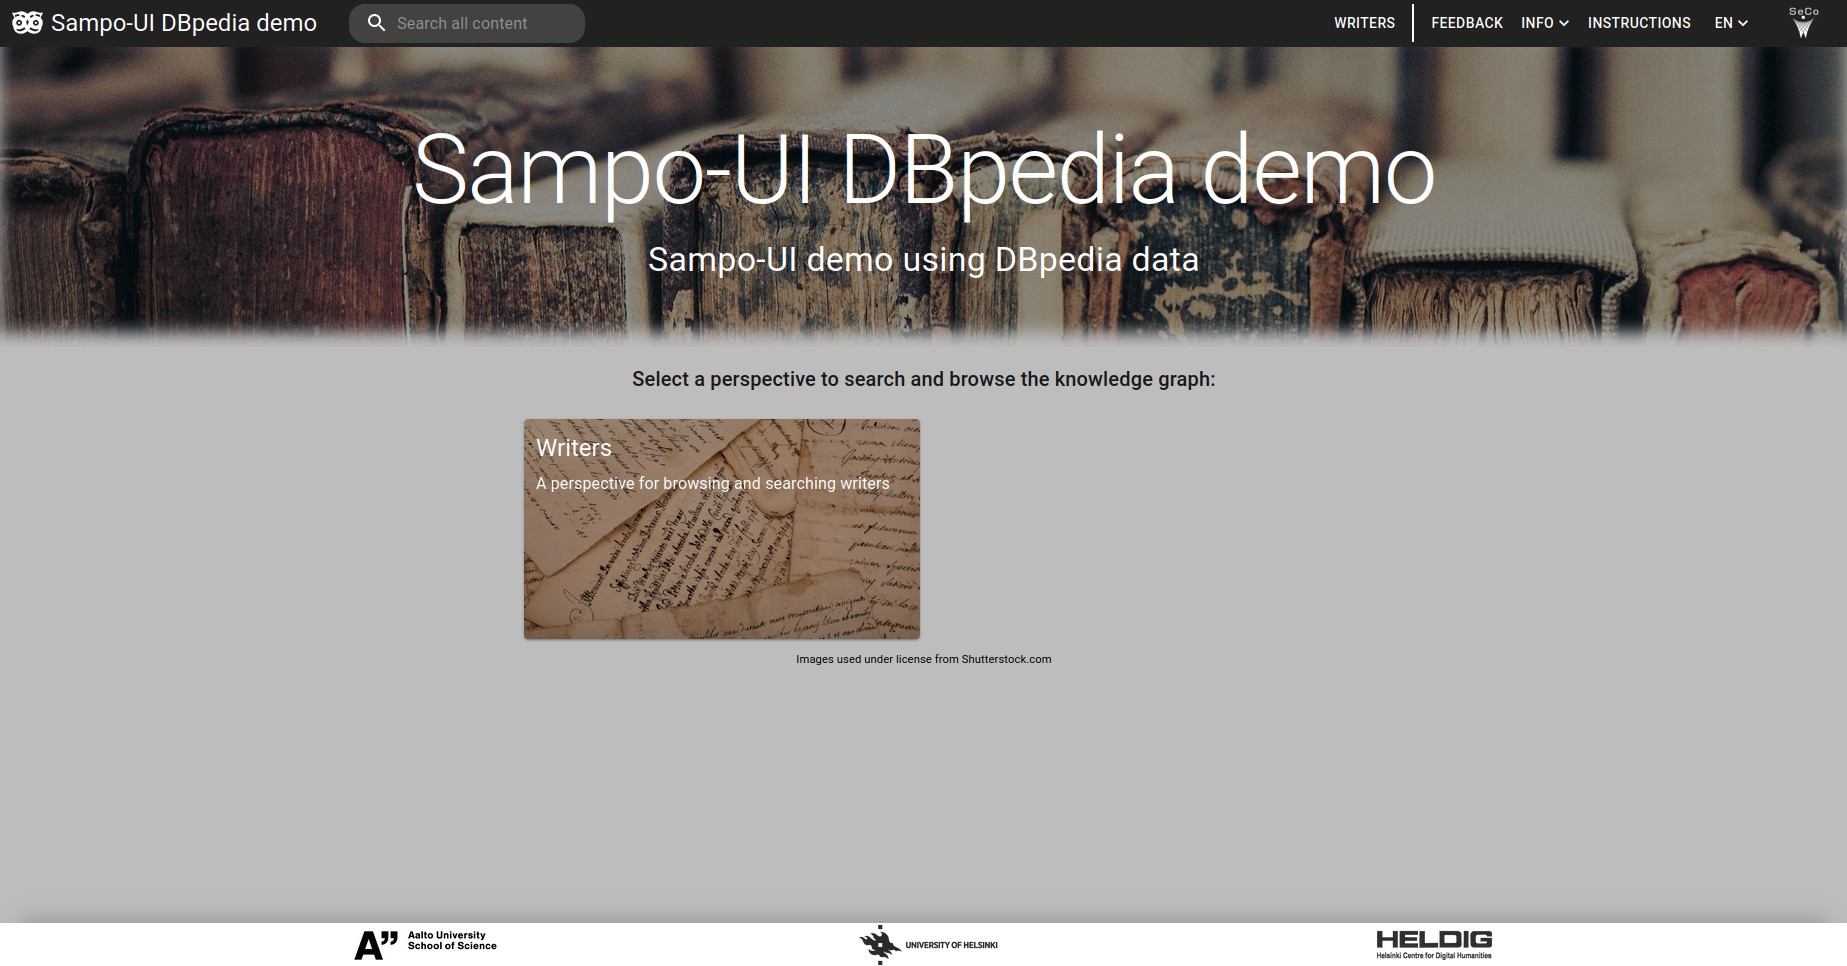
Let's just add the last finishing touches. We can edit the portal title and basic information at the start of the localization files.
...
"appTitle": {
    "short": "Sampo-UI DBpedia demo",
    "mobile": "S-UI Demo",
    "long": "Sampo-UI DBpedia demo",
    "subheading": "Sampo-UI demo using DBpedia data"
},
...
If we want to only show our Writers perspective, we
could hide the other perspectives by removing them from the
perspectives object in portalConfig.json:
...
"perspectives": {
    "searchPerspectives": [
        "perspective1"
    ],
    "onlyInstancePages": [
    ]
},
...
Or, if you want to, you could transform the other available
perspectives into new perspectives like we did with
perspective1! Our final portal looks like this:
You're now finished with the quickstart tutorial. Congratulations!
If you are interested in learning about configuration in Sampo-UI in more detail, you can check out the tutorial for the legacy version of Sampo-UI: https://seco.cs.aalto.fi/tools/sampo-ui/Sampo-UI-tutorial.pdf (see section Basic configuration). The file locations mentioned in the tutorial will be outdated, but the file names and the configuration logic still applies.
Credits
Sampo-UI is developed by the Semantic Computing Research Group (SeCo) and the Ghent Centre for Digital Humanities (GhentCDH). The work has been funded by FIN-CLARIAH and Clariah-VL and supported by CSC – IT Center for Science.